Skip to content
gluten free cheesecake recipe days usually start with me standing in the kitchen, craving something creamy and comforting, but not wanting the tummy trouble that can come with gluten. Maybe you have a birthday coming up, maybe you just want a Friday night treat, or maybe you are tired of paying a lot for tiny gluten free slices at a cafe. I have been there. This is the cheesecake I make when I want something reliable, simple, and honestly kind of impressive without trying too hard. It is smooth, lightly tangy, and the crust actually holds together instead of turning into sad crumbs. 
Best Practices for Gluten-Free Baking
If you are new to gluten free baking, cheesecake is a great place to start because the filling is naturally gluten free. The crust is usually the only part that needs attention. Still, a few small habits make a big difference, especially if you are baking for someone with celiac disease or a strong sensitivity.
Here are the practices I stick to every time:
1) Check every label, every time. Even if you bought the same brand last month, recipes and facilities change. Look for “gluten free” on your cookie crumbs, vanilla, and any toppings.
2) Avoid cross contact. Use a clean bowl, clean beaters, and a clean counter. If your house bakes with wheat flour, it can linger in tiny places. I like to wipe everything down and start fresh.
3) Room temp ingredients matter. Cold cream cheese can turn lumpy fast. Let cream cheese, eggs, and sour cream sit out for about 30 to 45 minutes.
4) Do not overmix. Cheesecake is not a “more mixing is better” situation. Too much air can lead to puffing and cracks. Mix until smooth, then stop.
5) Bake gently. Cheesecake likes a calm oven. A moderate temp and a slow cool down help keep the top smooth.
One more thing. If you are serving someone who is truly gluten free for medical reasons, it is worth using ingredients that are certified gluten free. It is a small step that builds a lot of trust at the table.

How to Make Gluten-Free Cheesecake Step by Step
This is my go to method. It is not fussy, but it gives that classic cheesecake vibe: creamy center, lightly firm edges, and a crust that tastes like a treat on its own. I am also adding a quick SEO table here so you can screenshot the basics and get baking.
What you will need
- 9 inch springform pan (this makes life easier)
- Large roasting pan or deep baking dish (for a water bath, optional but helpful)
- Mixing bowl and hand mixer or stand mixer
- Spatula
- Foil (if using a water bath)
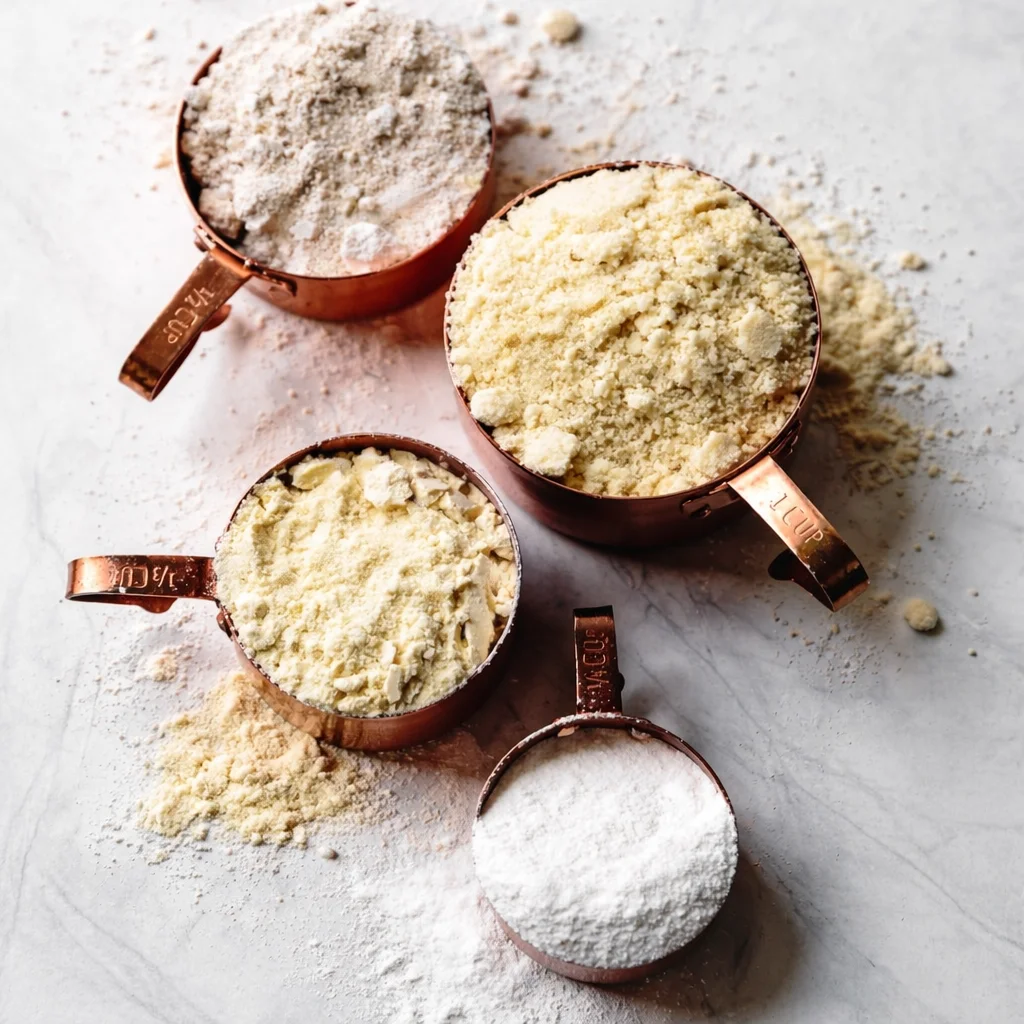
Ingredients
- For the crust
- 1 and 3/4 cups gluten free cookie crumbs (gluten free graham style or gluten free digestive style)
- 2 tablespoons sugar
- 6 tablespoons melted butter
- For the filling
- 24 ounces cream cheese, room temperature
- 3/4 cup sugar
- 1 cup sour cream, room temperature
- 1 and 1/2 teaspoons vanilla extract (check label)
- 3 large eggs, room temperature
- 1 tablespoon cornstarch (optional, helps with clean slices)
- Pinch of salt
Directions
Step 1: Prep the pan. Heat your oven to 325 F. Grease the bottom and sides of your springform pan. If you worry about leaks, you can wrap the outside of the pan with foil, even if you are not doing a water bath.
Step 2: Make the crust. Stir cookie crumbs, sugar, and melted butter until it looks like wet sand. Press it into the pan, firmly, especially around the edges. Bake for 9 to 10 minutes, then set aside to cool.
Step 3: Mix the filling. In a bowl, beat the cream cheese and sugar until smooth. Add sour cream, vanilla, salt, and cornstarch if you are using it. Mix just until combined.
Step 4: Add eggs carefully. Add eggs one at a time, mixing on low and stopping as soon as each egg disappears into the batter. Scrape down the bowl. If you see bubbles, you can tap the bowl lightly on the counter.
Step 5: Bake. Pour filling over the crust. For a water bath, place your foil wrapped springform pan into a larger pan and pour hot water into the larger pan until it comes about halfway up the sides. Bake 55 to 70 minutes. The center should still have a small jiggle, like set pudding.
Step 6: Cool slowly. Turn off the oven, crack the door open, and let it sit for 30 minutes. Then remove it and cool at room temp for about an hour. Chill at least 6 hours, overnight is even better.
I know waiting is the hardest part. But chilling is where the magic happens. The texture turns from soft to sliceable and the flavor settles into that classic tangy sweetness.
“I made this for my sister who is gluten free and she said it tasted like the real bakery cheesecake she misses. The crust held together perfectly and there were zero cracks.”
Expert Tips for Perfect Gluten-Free Cheesecake
I have made every cheesecake mistake possible. I have overbaked it, under chilled it, rushed the mixing, and tried to serve it too soon because I was excited. Here are the tips that actually fixed things for me.
Keep the oven temp steady. If your oven runs hot, your cheesecake will rise fast and sink, which can cause cracks. An oven thermometer is cheap and surprisingly helpful.
Do not open the oven a bunch. I know you want to peek. But the temperature swing can mess with the surface.
Stop baking while it still jiggles. The center should wobble a little when you gently shake the pan. It will finish setting as it cools.
Cool it slowly. That 30 minutes in the turned off oven is like a little spa session for cheesecake. It reduces sudden shrinking and helps prevent cracks.
Chill long enough for clean slices. I recommend overnight. If you are in a hurry, do at least 6 hours. For slicing, run a knife under hot water, wipe it, and slice. Repeat for neat edges.
If it cracks, you are still fine. I promise. A cracked cheesecake still tastes amazing. Toss berries on top and nobody will care. This is dessert, not a math test.
Ingredient Substitutions for Gluten-Free Cheesecake
This is the part I appreciate when I am halfway through a recipe and realize I am missing something. Here are swaps that keep the gluten free cheesecake recipe on track without turning it into a totally different dessert.
Crust options: Gluten free graham style crumbs are classic, but gluten free chocolate sandwich cookies are also great for a richer base. You can also use crushed gluten free pretzels for a salty sweet thing, just reduce added salt in the filling.
Butter: You can use melted coconut oil instead of butter for the crust. It firms up well when chilled. Flavor will be slightly coconut depending on the oil.
Sour cream: Full fat Greek yogurt works in the same amount. It makes the filling a touch tangier.
Sugar: Regular white sugar gives the cleanest flavor. If you use coconut sugar, the cheesecake will be darker and have a mild caramel taste. It is tasty, just different.
Cornstarch: You can skip it. Some people swear it makes slices cleaner and the texture slightly sturdier. If you cannot use corn, try arrowroot starch.
Dairy free note: You can experiment with dairy free cream cheese, but results vary a lot by brand. If you need dairy free, pick a brand you already trust and expect a softer set. The method stays the same, but chilling overnight becomes even more important.
Whatever you swap, keep the idea the same: a firm crust and a creamy filling that is not whipped full of air. That is what makes this gluten free cheesecake recipe feel bakery worthy.
Topping and Serving Ideas for Cheesecake
This is the fun part. I like to serve it plain the first time so you can taste that vanilla tang, then dress it up later with toppings. It is also the easiest way to make one cheesecake feel like multiple desserts across the week.
Simple toppings I love:
Fresh berries with a tiny pinch of sugar and a squeeze of lemon. Cherry pie filling if you want that classic diner look. A drizzle of melted chocolate. Or a spoon of lemon curd for a bright, zippy bite.
More “party” options:
Whipped cream and toasted nuts. Salted caramel sauce with flaky salt. Or crushed gluten free cookies sprinkled over the top for crunch.
Serving tips that make it easier:
Let the cheesecake sit at room temp for 10 minutes before slicing. Use a hot knife for clean cuts. If you are transporting it, keep it in the springform base and do not remove the ring until you arrive. It is less stressful, trust me.
If you are making this for guests, I like to put out two toppings in small bowls so people can choose. It feels fancy, but it is basically just letting everyone customize their slice.
Common Questions
Q: Can I make this gluten free cheesecake recipe without a springform pan?
A: Yes, but it is harder to remove neatly. Use a deep pie dish or a 9 inch cake pan lined with parchment strips. Expect to serve it more like a scoop and slice situation.
Q: How do I know it is done baking?
A: The edges should look set and slightly puffed, and the center should still jiggle a little. If the whole thing sloshes, it needs more time.
Q: Why did my cheesecake crack?
A: Usually it is from overbaking, overmixing, or cooling too fast. It still tastes great. Cover it with berries or whipped cream and call it a day.
Q: How long does it last in the fridge?
A: About 4 to 5 days, covered. The flavor is honestly best on day two.
Q: Can I freeze it?
A: Yes. Chill it first, then wrap slices tightly and freeze up to 2 months. Thaw overnight in the fridge for the best texture.
A creamy dessert you can actually count on
If you have been hunting for a gluten free cheesecake recipe that tastes like the real deal, this one is a keeper. Focus on room temperature ingredients, gentle mixing, and a slow cool down, and you will get that smooth, creamy texture every time. Try it plain first, then have fun with toppings once you know you love the base. If you bake it this week, I hope it becomes one of those recipes you keep coming back to when you want a treat that feels like home.

Gluten-Free Cheesecake
Ingredients
For the crust
- 1.75 cups gluten free cookie crumbs Gluten free graham style or gluten free digestive style
- 2 tablespoons sugar
- 6 tablespoons melted butter
For the filling
- 24 ounces cream cheese Room temperature
- 0.75 cups sugar
- 1 cup sour cream Room temperature
- 1.5 teaspoons vanilla extract Check label
- 3 large eggs Room temperature
- 1 tablespoon cornstarch Optional, helps with clean slices
- 1 pinch salt
Instructions
Preparation
- Prep the pan: Heat your oven to 325°F. Grease the bottom and sides of your springform pan. If you worry about leaks, you can wrap the outside of the pan with foil.
- Make the crust: Stir cookie crumbs, sugar, and melted butter until it looks like wet sand. Press into the pan firmly, especially around the edges. Bake for 9 to 10 minutes, then set aside to cool.
Mixing
- Mix the filling: In a bowl, beat the cream cheese and sugar until smooth. Add sour cream, vanilla, salt, and cornstarch if using. Mix just until combined.
- Add eggs carefully: Add eggs one at a time, mixing on low and stopping as soon as each egg disappears into the batter. Scrape down the bowl.
Baking
- Bake: Pour filling over the crust. For a water bath, place your foil wrapped springform pan into a larger pan and pour hot water into the larger pan until it comes about halfway up the sides. Bake 55 to 70 minutes, until the center has a small jiggle.
- Cool slowly: Turn off the oven, crack the door open, and let it sit for 30 minutes. Then remove and cool at room temperature for about an hour. Chill at least 6 hours, or overnight for best results.